Table of contents
- Where to find email templates?
- Creating a new template
- Improving your templates with Welcome AI
- Editing, duplicating, or deleting a template
- Associating a template with a job pipeline stage
- Canceling a scheduled message
- Using templates when managing applications
- Using templates from the inbox
- FAQ
Email templates allow you to standardize and speed up your communications with candidates throughout the recruitment process. With customizable messages and automated sends, you save valuable time without sacrificing the quality of your candidate experience.
Where to find email templates?
Email templates are accessible from the Settings page of your ATS. This is the centralized space where you can create, edit, duplicate, or delete your templates.
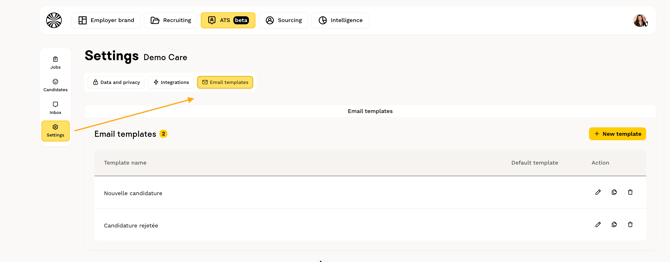
Two templates are available by default when you first get started:
- "Application received": can be automated to be sent instantly when a new application is received.
- "Application rejected": can be automated to be sent 24 hours after rejecting an application from your pipeline.
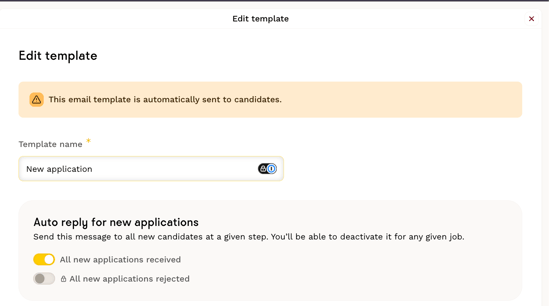
Creating a new template
From your ATS Settings, click the "+ New template" button. In the editor, you can:
- Enter the template name (for internal use only).
- Write your email content manually or with the help of Welcome AI.
- Add dynamic variables to automatically personalize the message (candidate's first name, job title, etc.).
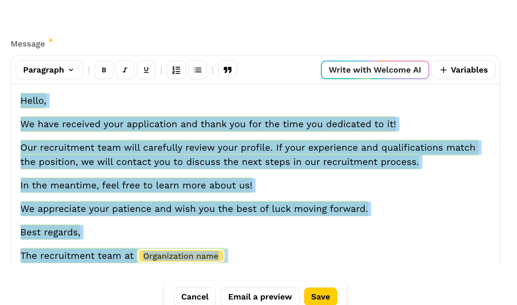
When your template is ready, you can receive a preview from the floating bar at the bottom of the editing screen:

💡 Good to know: if a variable is missing or incorrect, it appears in red in the editor as a warning. Always check your variables before saving your template.
Improving your templates with Welcome AI
A Welcome AI button is available directly in the template editor whenever text is present:
It gives you access to 5 actions to refine your messages:
| Action | Description |
|---|---|
| Rewrite | Rephrases while keeping the same meaning. |
| Correct | Corrects spelling and grammar. |
| Translate | Switches between French and English, or vice versa. |
| Shorten | Summarizes the message while keeping the essentials. |
| Expand | Adds depth to a short message. |
Not satisfied with the result? The modified parts are highlighted after each action, and you can undo at any time with Cmd+Z (on Mac) or Ctrl+Z (on PC).
💡 Tip: you can select only part of the text before clicking Welcome AI: the action will only apply to that selection, leaving the rest of the message unchanged.
Editing, duplicating, or deleting a template
From your template list, you have access to the following actions on each existing template:
- Edit: adjust the content or variables at any time.
- Duplicate: quickly create a new template based on an existing one.
- Delete: remove templates you no longer need.
⚠️ Warning: deleting a template is a permanent action, it cannot be recovered.
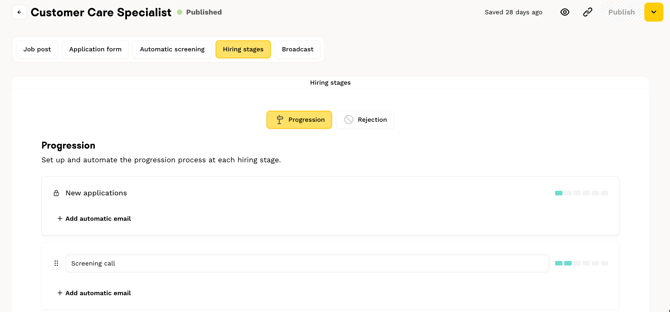
Associating a template with a job pipeline stage
When creating or editing a job post, you can associate an email template with each stage of your recruitment pipeline or rejection pipeline. To do so:
- Go to the "Recruitment stages" step when creating a job post.
- Click "+ Add an automatic email" under the desired stage.
- Select the corresponding template from the list provided.
- The email will be sent automatically when the candidate is moved to the corresponding column.
⚠️ Please note: when a candidate is moved to the rejected column, the rejection email is triggered 24 hours later.
Canceling a scheduled message
If you want to cancel an already scheduled email, go to the Messages tab of the application and click "Cancel sending" under the last scheduled message:
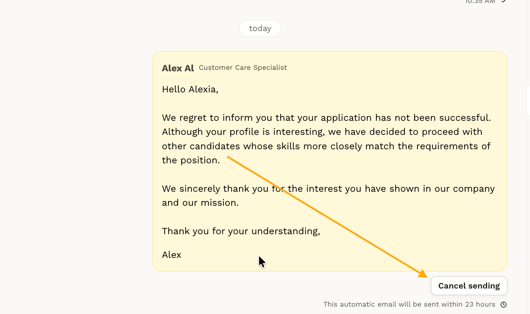
You will see a notification in the conversation thread confirming that the message has been successfully canceled.
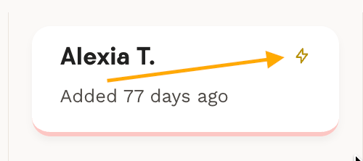
💡 Tip: in the "Rejected applications" pipeline view, a small lightning bolt icon may appear on an application card. It indicates that an automation is in progress (for example, a scheduled send with a 24-hour delay), allowing you to identify at a glance which actions are already planned.
Using templates when managing applications
When advancing or rejecting a candidate from their application profile, several options are available to you:
- Advance: if a template is associated with the next stage, the email is sent automatically.
- Advance with customization (custom progress): edit the template content before sending.
- Advance without email: the candidate is moved without any message being sent.
- Reject: if a template is associated with the rejection stage, the email is sent with a 24-hour delay.
- Reject with customization (custom reject): edit the template content before sending.
- Reject without email: the candidate is rejected without any message being sent.
Using templates from the inbox
From your inbox, you can also use your templates to contact a candidate. Simply select the desired template from the dropdown list:
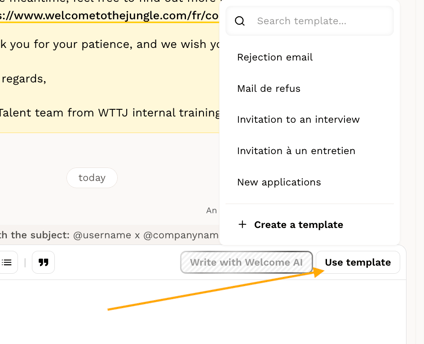
You can then edit the content before sending and send yourself a preview by email to check how it looks.
FAQ
- Where are email templates accessible? From the Settings page of your ATS. This is also where you create, edit, duplicate, or delete them.
- Which templates are available by default? Two templates are provided by default: "Application received" (sent immediately) and "Application rejected" (sent with a 24-hour delay).
- Can you customize an email before sending it? Yes, when advancing or rejecting a candidate, the "Advance with customization" and "Reject with customization" options allow you to edit the template content before sending.
- How do you cancel an already scheduled email? Go to the Messages tab of the relevant application, then click "Delete".
- How do you associate a template with a pipeline stage? When creating a job post, at the "Recruitment stages" step, click "+ Add an automatic email" under the desired stage, then select your template.
- Can you use Welcome AI to improve a template? Yes,the Welcome AI button is available in the template editor and offers 5 actions: rewrite, correct, translate, shorten, or expand your message.
🆘 If you have any other questions, you can contact us via the support widget in the bottom right corner, or through the contact form at this link.
Was this article helpful?
Yes No